

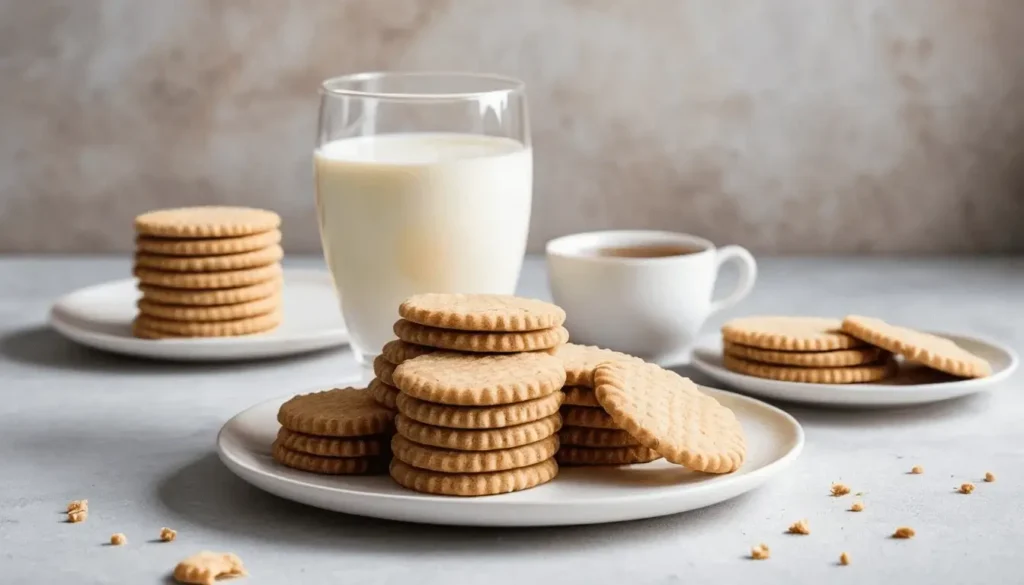
Wafer cookies are a delightful treat that never goes out of style. Known for their light, crispy texture and subtle sweetness, these thin, layered cookies are loved by dessert enthusiasts worldwide. Whether enjoyed on their own, paired with coffee or tea, or used as a versatile ingredient in more elaborate desserts, wafer cookies bring a perfect balance of crunch and flavor to any occasion.
What makes wafer cookies so special is their ability to adapt—available in classic vanilla, rich chocolate, or even gluten-free varieties. If you’ve ever thought about making them at home, you’re in for a treat! In this post, we’ll share 10 irresistible wafer cookie recipes that are easy to make, delicious, and sure to impress. Whether you’re a beginner or a seasoned baker, these recipes will help you bring the charm of wafer cookies into your kitchen.
What Makes Wafer Cookies So Irresistible?
The Unique Texture of Wafer Cookies
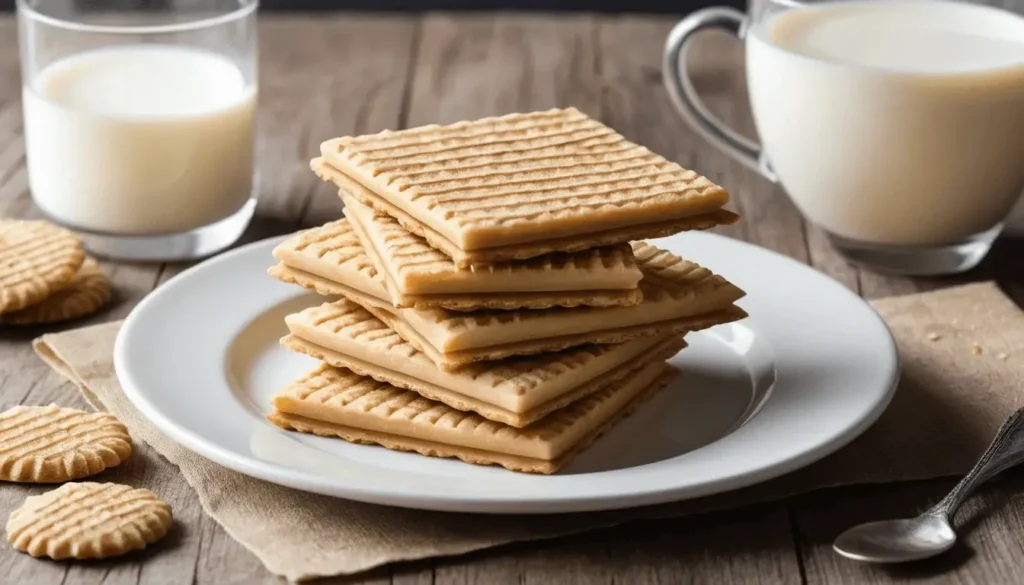
Wafer cookies stand out among the vast world of desserts due to their signature texture: light, crisp, and almost delicate. Their thin, layered structure gives them a satisfying crunch that melts effortlessly in your mouth. This unique texture is a result of their specialized preparation, which involves creating a batter that is spread thinly and baked at the perfect temperature.
Unlike denser cookies like chocolate chip or oatmeal, wafer cookies are airy and flaky. This makes them ideal for those who prefer a dessert that’s not overly heavy or rich. Each bite strikes a delightful balance, offering a crisp exterior with a subtle sweetness that complements a wide variety of flavors.
Wafer cookies are also incredibly versatile. Their texture can serve as a neutral base for both sweet and savory toppings, or as a complementary layer in more complex desserts. For example, they can be paired with creamy fillings like chocolate ganache or vanilla frosting to create decadent sandwich cookies, or layered with mousse and fruits in elegant dessert cakes.
Whether dipped in melted chocolate, used as an ice cream cone, or crushed into a crunchy topping, wafer cookies owe their charm to this unique texture. It’s what makes them a timeless favorite for both casual snacking and gourmet treats alike.
Perfect Pairings for Wafer Cookies
Wafer cookies are wonderfully versatile, making them the perfect companion for a variety of beverages, desserts, and treats. Their light, crispy texture and delicate sweetness make them a delightful addition to almost any culinary experience. Here are some of the best pairings to elevate your enjoyment of wafer cookies:
1. Coffee and Tea
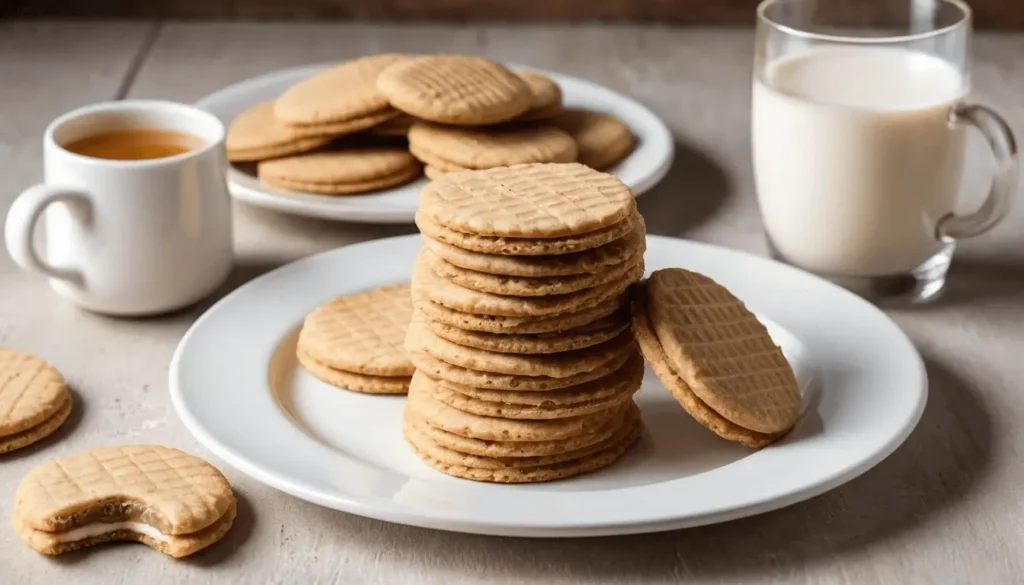
Wafer cookies are a classic choice for pairing with coffee or tea. The subtle sweetness and crispness of the cookies complement the rich, robust flavors of coffee or the soothing, herbal notes of tea. Dunking a wafer cookie into a hot beverage enhances its texture, softening it slightly while bringing out the flavors. Whether you prefer a creamy latte, a strong espresso, or a fragrant chai, wafer cookies are the perfect companion for your favorite cup.
2. Ice Cream
One of the most popular ways to pair wafer cookies is with ice cream. Their crisp texture contrasts beautifully with the creamy, cold consistency of ice cream. Use them as a crunchy garnish, crumble them over sundaes, or turn them into homemade ice cream sandwiches by layering your favorite flavor between two cookies. The possibilities are endless!
3. Chocolate and Spreads
Wafer cookies are often dipped in chocolate or paired with creamy spreads like Nutella, peanut butter, or fruit preserves. The combination of smooth and crunchy textures creates a decadent treat that’s perfect for satisfying your sweet tooth. For an elevated dessert, try drizzling dark chocolate over wafer cookies and sprinkling them with chopped nuts or sea salt.
4. Cheesecakes and Puddings
Crushed wafer cookies make an excellent base or topping for creamy desserts like cheesecakes, puddings, and trifles. Their lightness prevents the dessert from feeling too heavy while adding an irresistible crunch. You can also layer them between creamy fillings to add texture and flavor to parfaits or layered desserts.
5. Fruits and Whipped Cream
Pairing wafer cookies with fresh fruits and whipped cream creates a light and refreshing dessert. Their crispness complements the juiciness of fruits like strawberries, peaches, or mangoes, while the whipped cream adds a luscious finish. Stack them into a mini dessert tower or use them as a garnish for fruit salads to impress your guests.
Whether you’re indulging in a cozy moment with coffee or preparing an elaborate dessert for a special occasion, wafer cookies can take your pairings to the next level. Their versatility and subtle flavor ensure they’ll fit seamlessly into any culinary creation.
A Brief History of Wafer Cookies
Wafer cookies have a rich and fascinating history that dates back centuries, originating from early European culinary traditions. Their light, crisp texture and simple preparation made them a beloved treat across various cultures, evolving over time into the wafer cookies we know and love today.
1. Early Origins in Europe
The concept of wafers can be traced back to medieval Europe, where thin, crispy biscuits were crafted using simple ingredients like flour, water, and sugar. These early wafers were often baked using patterned irons, which pressed intricate designs onto the surface. These irons, predecessors to modern waffle makers, gave wafers their characteristic thinness and texture.
In many cultures, wafers were associated with religious rituals. For instance, in the Catholic Church, communion wafers were a sacred symbol, and their preparation followed strict guidelines. Outside of religious settings, sweetened wafers became a popular delicacy among the aristocracy, often served at banquets alongside wine and cheese.
2. Renaissance and Expansion
During the Renaissance period, wafers gained prominence as both a dessert and a culinary canvas for artistic expression. They were often flavored with exotic spices like cinnamon or anise, which were prized during the time. Recipes for wafers began appearing in European cookbooks, spreading their popularity throughout the continent.
Wafers also inspired regional variations. In Italy, the pizzelle became a holiday favorite, while in Germany, oblaten were used as a base for festive treats like lebkuchen. These adaptations laid the foundation for the diverse wafer styles we see today.
3. Industrial Revolution and Mass Production
The Industrial Revolution in the 19th century marked a turning point for wafer cookies. Advances in baking technology and the advent of mass production allowed wafers to be manufactured on a large scale. This made them more accessible to the general population, transforming them from a luxury item to a household staple.
By this time, layered wafer cookies filled with creams or spreads became increasingly popular. These innovations led to iconic treats like the Neapolitan wafer, a stack of thin wafers layered with chocolate, vanilla, or fruit-flavored fillings.
4. Modern Variations and Global Popularity
Today, wafer cookies are enjoyed worldwide in countless forms and flavors. Brands like Loacker and KitKat have elevated the wafer cookie into a global sensation, incorporating them into chocolate bars, layered cakes, and ice cream products. Additionally, homemade wafer cookie recipes have become a favorite for those seeking to recreate the classic treat with personal twists.
Culturally, wafers remain a symbol of simplicity and versatility, cherished for their ability to adapt to regional tastes and trends. From the traditional vanilla and chocolate varieties to gluten-free and vegan innovations, wafer cookies continue to delight dessert lovers of all ages.
Wafer cookies have come a long way from their humble beginnings as simple European confections. Their enduring appeal lies in their ability to balance history and innovation, remaining a timeless treat that resonates across generations and cultures.
Essential Ingredients and Tools for Wafer Cookies
Key Ingredients for Wafer Cookie Recipes
Wafer cookies are beloved for their simple yet delightful flavor, and the key to achieving that perfect texture and taste lies in the carefully chosen ingredients. While many wafer cookie recipes share a core set of ingredients, variations can offer unique twists on this classic treat. Below, we’ll explore the essential ingredients that go into making wafer cookies and how each contributes to the overall outcome.
1. Flour – The Foundation of Wafer Cookies
Flour is the main structure-building ingredient in wafer cookies. It provides the body and crispness that define their delicate, light texture. In most traditional wafer recipes, all-purpose flour is used, but you can experiment with different types, such as cake flour for an even softer bite or gluten-free flour blends for a gluten-free version.
The amount of flour used affects the cookie’s crispness—too much flour can result in a dry, crumbly texture, while too little may make the cookies too soft. The key is achieving a balance that allows the wafer to hold its shape while retaining the characteristic crispness that makes wafer cookies so irresistible.
2. Butter – Adding Richness and Flavor
Butter plays a vital role in giving wafer cookies their rich, tender texture. The fat in butter helps create that melt-in-your-mouth sensation that makes these cookies so delightful. Unsalted butter is typically preferred, as it allows you to control the level of salt in the recipe.
Butter also contributes to the overall flavor, adding a slightly creamy and savory undertone that balances out the sweetness from the sugar. For a slightly different flavor profile, you can use clarified butter (ghee), which has a nuttier taste and can help achieve a crispier texture.
3. Sugar – Sweetness and Texture
Sugar not only provides the sweetness we expect from wafer cookies, but it also affects the texture. In most wafer recipes, granulated sugar is used, as it dissolves well into the dough, giving the cookies a light and crisp structure when baked. The sugar also helps in browning, contributing to the golden color that wafer cookies are known for.
For those looking for a more unique flavor, alternatives like powdered sugar or brown sugar can add a bit of complexity, with powdered sugar providing a finer texture and brown sugar lending a touch of molasses richness. You can also experiment with natural sweeteners like honey, maple syrup, or stevia for healthier or different flavor profiles.
4. Eggs – Binding and Lightness
Eggs are crucial for binding the ingredients together, providing structure, and ensuring that the dough doesn’t fall apart during baking. They also contribute to the lightness and airy texture that wafer cookies are known for. In a typical wafer recipe, whole eggs are used, but for a lighter, crisper texture, some recipes may call for egg whites only, which help to create a more delicate, crisp consistency.
For those who prefer egg-free or vegan recipes, flax eggs (a mixture of ground flaxseed and water) or chia eggs can serve as substitutes. These alternatives help to provide the binding effect while keeping the cookies plant-based.
5. Vanilla Extract – The Essential Flavor
The flavor of vanilla extract is one of the defining characteristics of traditional wafer cookies. Its warm, aromatic notes complement the sweetness of the sugar and the richness of the butter, creating a harmonious flavor profile. Pure vanilla extract is preferred for the most natural and intense flavor, but vanilla essence or even vanilla bean paste can be used for a more concentrated taste.
You can also experiment with other flavorings, like almond extract for a nutty twist or lemon zest for a fresh citrus note. These variations can elevate the flavor of the classic wafer and make it unique to your taste.
6. Salt – Balancing Sweetness and Enhancing Flavor
Though it’s a small component, salt is essential for bringing balance to the sweetness of the sugar. A pinch of fine sea salt or kosher salt enhances the overall flavor profile and helps to cut through the richness of the butter. Salt also helps to bring out the natural flavors of the vanilla and other ingredients, making the cookies taste more complex and satisfying.
7. Optional Add-ins for Flavor Variations
While the ingredients above form the base of traditional wafer cookies, you can customize your recipe with a variety of add-ins to suit your taste:
- Cocoa powder: For a chocolatey variation, add a bit of cocoa powder to the dough for chocolate wafer cookies.
- Ground spices: Cinnamon, nutmeg, or cardamom can add warmth and depth, especially for seasonal or holiday recipes.
- Nuts: Finely chopped almonds, hazelnuts, or pistachios can provide a delightful crunch and complement the smoothness of the wafer.
- Citrus zest: Lemon, orange, or lime zest can provide a refreshing, zesty twist.
In summary, the key ingredients for wafer cookies—flour, butter, sugar, eggs, and vanilla extract—work together to create the light, crisp texture and delightful flavor that make them a beloved treat. Whether you stick to the classic combination or get creative with variations, these ingredients are the building blocks for crafting irresistible wafer cookies every time.
Kitchen Tools You’ll Need for Wafer Cookies
Making wafer cookies requires a few essential kitchen tools to ensure that the dough is mixed correctly, the cookies are baked to perfection, and the process goes smoothly. While the list of tools may seem minimal, each piece of equipment plays a vital role in achieving the delicate texture and precise results that wafer cookies are known for. Here’s a breakdown of the must-have kitchen tools for making wafer cookies:
1. Mixing Bowls – For Combining Ingredients
To start, you’ll need a few mixing bowls to combine the wet and dry ingredients. It’s best to have a set of bowls in various sizes, as you may need to separate the flour from other dry ingredients or whisk the butter, sugar, and eggs in a larger bowl. Stainless steel or glass bowls work best, as they are durable, easy to clean, and non-reactive.
A large mixing bowl is ideal for creaming the butter and sugar, while a smaller bowl can be used to mix dry ingredients like flour, salt, and any spices. If you’re using any kind of sifted ingredients (like powdered sugar or cocoa powder), a fine mesh sieve or sifter is also essential to avoid clumps in your dough.
2. Hand Mixer or Stand Mixer – For Easy Mixing
While it’s possible to mix the ingredients by hand, a hand mixer or stand mixer can save time and effort, especially when creaming butter and sugar to the proper consistency. A hand mixer will give you better control over the speed and mixing process, while a stand mixer, with its paddle attachment, is especially useful for larger batches.
The mixer will help aerate the butter and sugar, which is key to achieving the light, airy texture of wafer cookies. It also ensures that all ingredients are thoroughly combined and that the dough reaches a smooth, even consistency.
3. Rolling Pin – For Evenly Rolling the Dough
One of the most important steps in making wafer cookies is rolling the dough to the desired thickness. A rolling pin is essential for this task, as it ensures the dough is evenly spread. To achieve the signature thinness of wafer cookies, the dough should be rolled out as thinly as possible, typically around 1/8 inch thick.
A marble rolling pin is a great option, as it stays cool and prevents the dough from sticking. If you don’t have a marble rolling pin, a standard wooden rolling pin works just as well, and you can lightly dust it with flour.
4. Cookie Cutters – For Shaping Your Cookies
For a traditional look, cookie cutters are a must-have tool. While you can make wafer cookies in any shape, round cutters are most commonly used to create the classic look. If you want to make your cookies more festive or unique, you can use different shapes like stars, hearts, or even fluted cutters.
For added precision, consider using a ruler to measure the dough before cutting, ensuring each piece is uniform in size. This is particularly important if you’re stacking wafers to create layered desserts like wafer cakes.
5. Baking Sheets and Parchment Paper – For Baking the Cookies
Baking sheets are essential for laying out the wafer cookies as they bake. To ensure that the cookies don’t stick to the sheet or burn on the bottom, line your baking sheets with parchment paper or a silicone baking mat. These will allow the cookies to bake evenly and make cleanup a breeze.
If you’re baking multiple trays of cookies, make sure your baking sheets are large enough to accommodate several rows of cookies without overcrowding them. Allowing enough space between each cookie ensures proper airflow during baking, helping them achieve their signature crispness.
6. Cooling Racks – To Keep the Wafer Cookies Crisp
Once baked, it’s important to let the wafer cookies cool properly to maintain their crisp texture. Cooling racks allow the cookies to cool evenly, preventing moisture from building up underneath the cookies and making them soggy.
A cooling rack promotes air circulation around the cookies, helping them retain their crunch. It’s also a great place to let the cookies set if you plan on decorating them or filling them with cream or chocolate. If you’re making multiple batches, cooling racks allow you to keep the process moving without overcrowding your work surface.
7. A Pastry Brush – For Light Coating or Glazing
For certain recipes, you might want to glaze or coat your wafer cookies with a thin layer of chocolate, icing, or even a simple egg wash before baking. A pastry brush is the perfect tool for this job. It allows for a gentle, even application of your glaze, ensuring that your cookies get a light, glossy finish without excess coating.
You can also use a pastry brush to lightly dust your cookies with powdered sugar or cinnamon after baking for an added touch of elegance and flavor.
8. A Knife or Pizza Cutter – For Cutting
After the dough has been rolled out, you may need to cut it into uniform pieces before baking. A sharp knife works fine for this, especially for making straight cuts. Alternatively, a pizza cutter is an excellent tool for cutting the dough into perfect squares or rectangles, providing an even cut with minimal effort.
This tool is especially useful for creating cookies that will be stacked, such as in layered desserts, where uniformity is important.
9. Optional: Waffle Iron – For Traditional Waffle-Style Wafers
Some wafer cookies, especially those with a unique texture and appearance, are made using a waffle iron. This appliance is especially useful for making pizzelle-style wafers or other traditional wafer varieties that have a patterned finish.
If you’re interested in creating more intricate, textured wafer cookies, investing in a waffle iron with different patterns can add a fun and decorative touch to your baking.
Tips for Success in Making Wafer Cookies
Making wafer cookies might seem simple, but achieving the perfect balance of crispness, flavor, and texture requires some attention to detail. To help you create batch after batch of delicious wafer cookies, here are some expert tips that can guide you through the process and ensure your cookies turn out just right.
1. Keep the Dough Thin
One of the key elements of a perfect wafer cookie is its thinness. The dough should be rolled out to about 1/8 inch thick to achieve the signature crispy texture that makes wafer cookies so delightful. If your dough is too thick, the cookies will come out more cake-like and lack that delicate crispiness.
To ensure an even thickness, use a rolling pin with thickness guides, or roll the dough between two sheets of parchment paper to prevent sticking. If you find it challenging to get the dough uniformly thin, you can use a ruler or a measuring tape to check the thickness as you go.
2. Don’t Overmix the Dough
While it’s tempting to keep mixing the dough until it’s perfectly smooth, overmixing can lead to dense, tough wafer cookies. Mix the dough just until the ingredients are combined, and avoid overworking the batter. Overmixing can cause the flour to develop excess gluten, which results in chewy, heavy cookies rather than the crisp, light texture you’re aiming for.
It’s also essential to cream the butter and sugar well before adding the dry ingredients, as this helps incorporate air into the dough, contributing to a lighter, fluffier cookie.
3. Chilling the Dough is Key
Chilling the dough before rolling it out is a crucial step, as it helps to firm up the dough, making it easier to handle and roll out thinly. Refrigerating the dough for at least 30 minutes (or up to an hour) gives the butter a chance to solidify, which prevents the dough from becoming too sticky and difficult to work with.
Chilling also ensures that your cookies hold their shape better while baking, preventing them from spreading too much in the oven. If you’re in a rush, you can even chill the dough in the freezer for about 10-15 minutes for a quicker set.
4. Use Parchment Paper for Easy Handling and Clean Up
When baking wafer cookies, parchment paper is your best friend. It prevents the cookies from sticking to the baking sheet, making cleanup a breeze. Plus, it helps to evenly distribute heat during baking, ensuring that the cookies bake uniformly.
Place a sheet of parchment paper on your baking sheets and arrange the cut-out cookie dough on top, leaving enough space between each cookie for even heat circulation. If you’re using multiple trays, parchment paper can help you easily switch between batches without needing to wash the baking sheets between uses.
5. Monitor Baking Time Closely
Wafer cookies bake quickly, so it’s essential to keep an eye on them to avoid overbaking. Bake your cookies at a moderate temperature, typically around 350°F (175°C), for 8-10 minutes, or until they are lightly golden brown and crisp.
Because wafer cookies are thin, they can burn or become too dark easily. As soon as you see the edges turning golden, remove the cookies from the oven. They will continue to crisp up as they cool. It’s also a good idea to rotate your baking sheets halfway through the baking time for even browning.
6. Allow the Cookies to Cool Properly
After baking, it’s crucial to allow your wafer cookies to cool on a cooling rack. Cooling the cookies properly helps them retain their crunch and prevents them from becoming soggy. If you leave them on the hot baking sheet for too long, the trapped heat can cause condensation, which will soften the cookies.
The cooling process also allows the cookies to firm up fully, making them easier to handle if you plan to stack them or dip them in chocolate. If you’re making a layered dessert or adding a filling, wait until the cookies have cooled completely before assembling to ensure they don’t get soggy.
7. Experiment with Flavor Variations
While classic vanilla wafer cookies are always a hit, don’t be afraid to get creative with different flavors and fillings. Some popular variations include:
- Chocolate wafer cookies: Add cocoa powder or melted chocolate to the dough for a rich, indulgent twist.
- Nutty wafer cookies: Finely chopped nuts like almonds or hazelnuts can be mixed into the dough for added texture and flavor.
- Spices: A pinch of cinnamon, cardamom, or nutmeg can elevate your wafer cookies and give them a warm, aromatic flavor, perfect for seasonal baking.
- Fruit zest: Fresh lemon, orange, or lime zest can add a refreshing and citrusy kick to your cookies.
Try incorporating these variations to create unique versions of wafer cookies that suit different tastes and occasions.
8. Use the Right Type of Flour
The type of flour you use can greatly impact the texture of your wafer cookies. All-purpose flour is the most common choice for classic wafer cookies, but if you’re aiming for a particularly delicate texture, you can experiment with cake flour. Cake flour has a lower protein content, resulting in a softer, more tender cookie.
For a gluten-free version, consider using a gluten-free flour blend or almond flour. Keep in mind that these alternative flours may require slight adjustments in the amount of liquid or baking time, so some experimentation may be necessary.
9. Be Mindful of Humidity
Humidity can affect the texture of your wafer cookies, especially if you live in a humid climate. The dough may become stickier or softer, making it harder to roll out. If you’re baking in a humid environment, you might need to add a little extra flour to the dough to maintain the right consistency.
In high humidity, it’s also a good idea to bake the cookies in smaller batches and allow them to cool completely in a dry area to maintain their crispness.
10. Store Properly to Keep Them Crispy
Once your wafer cookies are baked, it’s essential to store them correctly to preserve their crispy texture. Airtight containers or cookie jars are ideal for keeping your wafer cookies fresh. Avoid storing them in plastic bags or containers that aren’t sealed tightly, as this can cause the cookies to become soft or lose their crunch.
If you plan on making wafer cookies in advance or storing them for later, place a layer of parchment paper between the cookies to prevent them from sticking together. For longer storage, you can freeze the cookies, although the texture may be slightly affected once thawed.
10 Irresistible Wafer Cookie Recipes
Classic Vanilla Wafer Cookies: A Timeless Treat with a Twist
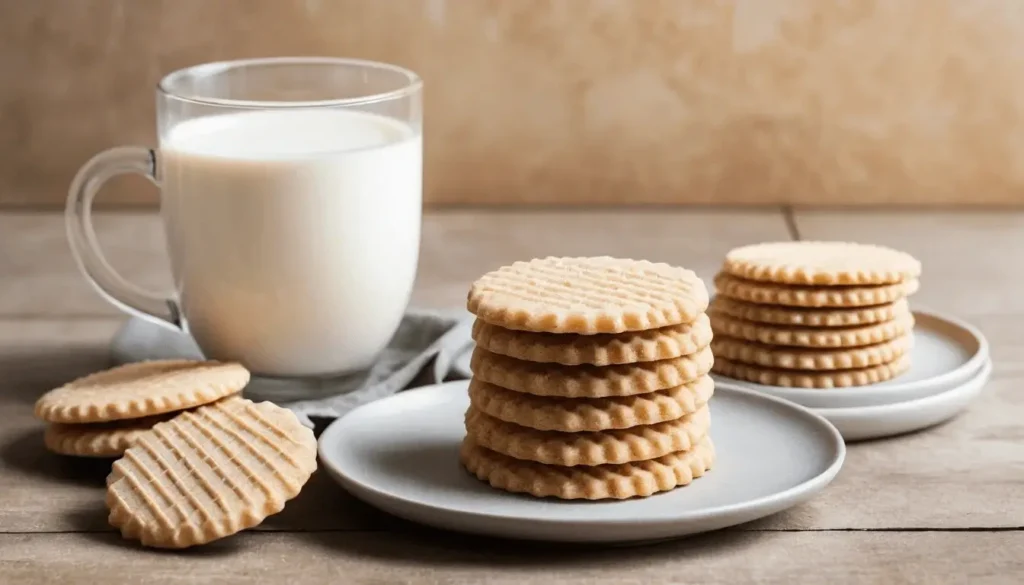
Classic vanilla wafer cookies are a cherished favorite, offering a perfect balance of flavor and texture. These cookies are known for their delicate, crisp crunch, a result of carefully crafted dough that bakes into thin, wafer-like layers. Their subtle sweetness, paired with the rich undertones of vanilla, makes them irresistible on their own or as a component in more elaborate desserts. Here, we’ll explore how to perfect this classic recipe while adding a few twists to elevate it to a new level of indulgence.
A Closer Look at the Essential Ingredients
What makes classic vanilla wafer cookies so distinctive is the simplicity of their ingredients, yet the magic lies in the precision of how they are combined. Below is a breakdown of the key ingredients that contribute to the cookie’s unique texture and flavor:
- High-Quality Butter: The foundation of any good wafer cookie is butter. It’s best to use unsalted butter to maintain control over the flavor balance. Butter provides a creamy richness, and its fat content is critical in helping achieve that crisp, melt-in-your-mouth texture that defines wafer cookies.
- Pure Vanilla Extract: Vanilla is the defining flavor of these cookies. For the best taste, always use pure vanilla extract rather than imitation vanilla. The depth and complexity of pure vanilla elevate the flavor profile, giving the cookies that warm, aromatic sweetness that pairs perfectly with the buttery richness.
- Egg Yolks: Unlike many other cookie recipes that call for whole eggs, classic vanilla wafer cookies often use only egg yolks. This gives the cookies a softer, tender texture without compromising on crispness. Egg yolks also help bind the ingredients together, contributing to the cookies’ delicate crumb.
- Sugar: The sweetness in these cookies comes from granulated sugar. Unlike brown sugar, which brings molasses notes, granulated sugar allows the vanilla and butter to shine through without overpowering them. A light sprinkling of sugar on top before baking also helps achieve that delightful, golden-brown finish.
- All-Purpose Flour: All-purpose flour provides the structure needed for the cookies. The goal is to keep the dough light, which is why it’s essential to sift the flour to ensure even distribution and eliminate any lumps that could disrupt the delicate balance of the dough.
Perfecting the Texture: Techniques for Thin, Crispy Cookies
One of the hallmarks of a classic vanilla wafer cookie is its thinness. Achieving the perfect crispiness requires careful handling of the dough and baking techniques.
- Roll the Dough Thin: The dough should be rolled out as thinly as possible without compromising its ability to hold its shape. Aim for about 1/8-inch thickness. If the dough is too thick, the cookies will not achieve the crisp texture you’re looking for. For a consistent thickness, use a rolling pin with thickness guides or roll the dough between two sheets of parchment paper.
- Chill the Dough: After mixing the dough, it’s important to refrigerate it for about 30 minutes. Chilling the dough helps firm it up, making it easier to roll out thinly. It also helps the cookies maintain their shape during baking and prevents them from spreading too much.
- Bake on a Parchment-Lined Sheet: For even baking and to prevent sticking, always line your baking sheet with parchment paper. The paper also ensures that heat is evenly distributed, allowing the cookies to bake uniformly and maintain their crisp texture.
Baking: Achieving the Perfect Golden Brown Color
Baking is the final step to perfecting your classic vanilla wafer cookies. While it may seem straightforward, timing and temperature are key to ensuring the cookies turn out crisp and light.
- Baking Temperature: Bake the cookies at 350°F (175°C), which is the optimal temperature for crisping the dough without burning it. A hotter oven might cause the cookies to brown too quickly, resulting in an overly dark, less crispy texture.
- Keep an Eye on Them: These cookies bake quickly, so it’s essential to keep an eye on them in the last few minutes. Once the edges begin to turn golden and the center looks firm, remove the cookies from the oven. They’ll continue to crisp as they cool.
Elevating Classic Vanilla Wafer Cookies with Flavor Variations
While the classic version is delicious on its own, there’s always room to add a personal touch or elevate the flavor to suit different tastes.
- Lemon Zest: For a bright and refreshing twist, add a teaspoon of lemon zest to the dough. This will infuse the cookies with a tangy, citrusy note that pairs beautifully with the richness of the vanilla and butter.
- Chocolate Dipped Wafer Cookies: For a decadent version, dip the cooled vanilla wafer cookies into melted dark chocolate. The rich chocolate coating adds a touch of indulgence and complements the crispy texture of the wafer cookie perfectly.
- Cinnamon and Nutmeg: A dash of cinnamon or nutmeg can add a cozy, warm spice to the cookies, making them perfect for fall or winter baking. Just a pinch of either spice can create an inviting aroma that enhances the vanilla flavor.
- Almond Extract: For a more complex flavor, swap out some of the vanilla extract for almond extract. This subtle nutty flavor will give your wafer cookies a slightly different dimension, making them even more memorable.
Classic Vanilla Wafer Cookies in Desserts
Classic vanilla wafer cookies are not only a treat on their own but can also be incorporated into many popular desserts, adding both flavor and texture.
- Banana Pudding: One of the most beloved ways to enjoy vanilla wafer cookies is in banana pudding. The cookies are layered with slices of ripe bananas and vanilla pudding, soaking up the pudding’s moisture while retaining their crisp texture.
- Icebox Cake: Vanilla wafer cookies are also a staple in icebox cakes, where they are layered with whipped cream or mascarpone cheese to create a creamy, no-bake dessert. The cookies soften as they soak in the cream, but they still maintain a slight crunch that contrasts beautifully with the smooth filling.
- Pie Crust: Crush vanilla wafer cookies to create a unique pie crust. The cookies bring a delicate sweetness and crisp texture to pies like cheesecake or key lime pie, giving the dessert an added layer of flavor.
Tips for Storing and Enjoying Your Classic Vanilla Wafer Cookies
Once baked and cooled, your classic vanilla wafer cookies are ready to be enjoyed. To keep them fresh and crispy:
- Airtight Container: Store the cookies in an airtight container to maintain their crispness. A well-sealed container will prevent moisture from softening the cookies and ensure they stay crunchy.
- Separate Layers: If you have multiple layers of cookies, use parchment paper between the layers to prevent them from sticking together.
- Freezing for Later: If you want to make a large batch in advance, these cookies freeze well. Store them in a freezer-safe container with parchment paper between each layer. When you’re ready to enjoy them, just let them thaw at room temperature, and they’ll be as crisp as the day you made them.
Chocolate Wafer Cookies
Chocolate wafer cookies bring a unique combination of rich chocolate flavor and an airy, crisp texture to the dessert table. Loved for their versatility, these cookies can be enjoyed as a standalone treat or as a component in more elaborate desserts. Let’s explore what sets chocolate wafer cookies apart, how to make them shine, and the many ways they can be enjoyed.
The Allure of Chocolate Wafer Cookies
What makes chocolate wafer cookies so special? It’s their ability to deliver a bold cocoa punch in a light and delicate form. Unlike heavy, fudgy cookies, chocolate wafer cookies are thin and crisp, making them perfect for layering, crumbling, or simply savoring as-is.
Their simplicity is their strength—minimal ingredients, maximum flavor. The subtle bitterness of cocoa powder is perfectly balanced with just the right amount of sweetness, making these cookies irresistible for chocolate lovers.
Essential Ingredients for Chocolate Wafer Cookies
The key to the perfect chocolate wafer cookie lies in the quality of the ingredients:
- High-Quality Cocoa Powder: The foundation of the cookie’s flavor. Opt for unsweetened cocoa powder, or try Dutch-processed cocoa for a smoother, less acidic taste.
- Butter or Alternative Fats: Butter adds richness and enhances the cookie’s crispness. For a dairy-free option, substitute with coconut oil or vegan margarine.
- Sugar: Granulated sugar provides the perfect sweetness to complement the chocolate. You can experiment with alternative sweeteners like coconut sugar for a slightly different flavor profile.
- Flour: All-purpose flour gives structure to the cookies. For a gluten-free option, use almond or oat flour, though the texture may differ slightly.
- Vanilla and Salt: These small additions deepen the flavor profile, enhancing the cocoa without overpowering it.
Steps to Create Perfect Chocolate Wafer Cookies
Achieving flawless chocolate wafer cookies requires attention to detail. Follow these steps for success:
- Mix the Dough: Cream softened butter and sugar together until light and fluffy. Gradually incorporate the vanilla extract and sifted cocoa powder to ensure even distribution. Add the flour and salt, mixing just until a cohesive dough forms.
- Chill for Precision: Wrap the dough in plastic wrap and refrigerate for at least 30 minutes. This step makes the dough easier to roll out and helps maintain the cookies’ shape during baking.
- Roll and Cut: Roll the dough to about 1/8-inch thickness between two sheets of parchment paper. Use a sharp cookie cutter to create uniform shapes.
- Bake to Perfection: Bake the cookies in a preheated oven at 350°F (175°C) for 8–10 minutes. The cookies should feel slightly firm to the touch but not overly hard; they will crisp up as they cool.
Creative Uses for Chocolate Wafer Cookies
Chocolate wafer cookies are more than just a snack—they’re a versatile ingredient that can elevate other desserts:
- Ice Cream Cakes: Use chocolate wafers as layers in no-bake ice cream cakes. Their thin, crisp structure absorbs just enough moisture to become perfectly tender.
- Cheesecake Crusts: Crush chocolate wafers to form the base of a rich cheesecake. Their deep chocolate flavor complements creamy fillings beautifully.
- Cookie Sandwiches: Spread marshmallow cream, ganache, or peanut butter between two wafers for an indulgent twist.
- Chocolate Bark Toppers: Break cookies into shards and scatter them over melted chocolate bark for added texture and flavor.
Storage Tips for Maximum Freshness
To keep your chocolate wafer cookies fresh and crisp:
- Airtight Containers: Keep the cookies in an airtight container at room temperature to maintain freshness for up to one week.
- Freeze for Future Use: Freeze baked cookies in a sealed bag for up to three months. For best results, layer parchment paper between cookies to prevent sticking.
Gluten-Free Wafer Cookies: A Crisp Treat for Everyone
For those with gluten sensitivities or dietary preferences, gluten-free wafer cookies offer the same delightful crunch and flavor as traditional recipes but without the use of wheat flour. With the right ingredients and techniques, you can create light, crisp, and flavorful cookies that everyone can enjoy, whether they’re avoiding gluten or not.
Key Ingredients for Gluten-Free Wafer Cookies
The key to a successful gluten-free wafer cookie lies in carefully chosen alternative flours and binders that replicate the texture of traditional wheat-based cookies:
- Gluten-Free Flour Blend: A high-quality all-purpose gluten-free flour blend is essential. Look for blends that include a mix of rice flour, tapioca starch, and potato starch for a light and airy texture.
- Almond Flour: Adding a small amount of almond flour can enhance the flavor and provide a slightly nutty undertone, as well as help with crispness.
- Xanthan Gum or Guar Gum: These act as binding agents, providing elasticity and structure that gluten normally offers. If your gluten-free flour blend already contains one of these, there’s no need to add more.
- Butter or Coconut Oil: Both options work well to add richness and crispness to the cookies. For a dairy-free version, coconut oil or vegan butter are excellent substitutes.
- Sugar: Granulated sugar or a natural alternative like coconut sugar or maple sugar can sweeten the cookies without affecting their texture.
- Vanilla Extract and Salt: These elevate the flavor and balance the sweetness.
- Egg Whites: Egg whites provide a light structure to the cookies and help create the delicate crispness wafer cookies are known for.
Tips for Baking Gluten-Free Wafer Cookies
Baking gluten-free wafer cookies requires slight adjustments to ensure the best results. Follow these tips for success:
- Mix with Care: Combine wet and dry ingredients gently to avoid overmixing. Overmixing gluten-free dough can lead to a dense texture.
- Chill the Dough: Gluten-free dough is often softer and stickier than traditional dough. Refrigerating the dough for 30–60 minutes makes it easier to roll and cut.
- Roll Thinly: Wafer cookies rely on their delicate texture, so aim for a thickness of about 1/8 inch. Rolling between parchment paper prevents sticking.
- Bake at the Right Temperature: Gluten-free cookies can brown quickly. Bake at 325°F (160°C) for a slightly longer time than traditional recipes, keeping a close eye to ensure even baking.
Flavor Variations for Gluten-Free Wafer Cookies
One of the best parts of making gluten-free wafer cookies is the ability to experiment with flavors. Try these ideas for something different:
- Chocolate Gluten-Free Wafers: Add unsweetened cocoa powder to the flour mix for a rich chocolate flavor.
- Citrus Twist: Incorporate lemon or orange zest into the dough for a bright, zesty flavor.
- Spiced Wafers: Add cinnamon, nutmeg, or cardamom for a warm and aromatic cookie.
- Herbal Notes: A touch of dried lavender or rosemary can create a unique and sophisticated flavor profile.
Creative Uses for Gluten-Free Wafer Cookies
Gluten-free wafer cookies are versatile and can be used in many creative ways:
- Layered Icebox Desserts: Use gluten-free wafers as layers in no-bake desserts with whipped cream or custard.
- Pie Crust Alternative: Crush the cookies to form the base for gluten-free cheesecakes or pies.
- Decorative Toppings: Crumble them over yogurt, ice cream, or parfaits for added crunch.
- Dipped and Decorated: Dip the wafers in chocolate and sprinkle with chopped nuts, seeds, or gluten-free sprinkles for a festive treat.
Storage Tips for Gluten-Free Wafer Cookies
To keep your gluten-free wafer cookies fresh and crisp:
- Use an Airtight Container: Store the cookies in an airtight container at room temperature for up to 5–7 days. To maintain maximum crispness, include a small packet of food-safe silica gel in the container.
- Freeze for Longevity: Gluten-free cookies freeze well. Place them in a freezer-safe bag or container, separating layers with parchment paper, and store for up to three months. Thaw at room temperature before serving.
No-Bake Wafer Cookie Bars: A Simple and Delicious Treat
No-bake wafer cookie bars are the perfect solution when you want a quick, crowd-pleasing dessert without the hassle of turning on the oven. These bars combine the light, crisp texture of wafer cookies with rich, creamy layers, creating a dessert that’s both indulgent and easy to prepare. They’re versatile, customizable, and ideal for any occasion, from casual get-togethers to festive celebrations.
Why Choose No-Bake Wafer Cookie Bars?
No-bake desserts are a lifesaver for busy days or when it’s simply too warm to bake. Here’s what makes these bars stand out:
- Quick to Assemble: With minimal preparation time, you can create a dessert that looks and tastes like it took hours to make.
- Customizable Flavors: From chocolate and peanut butter to fruity or nutty layers, the combinations are endless.
- Perfect for All Skill Levels: Whether you’re a seasoned baker or a beginner, these bars are nearly foolproof.
Key Ingredients for No-Bake Wafer Cookie Bars
The beauty of no-bake wafer cookie bars is their flexibility. Here are the common ingredients that form the foundation:
- Wafer Cookies: These serve as the base and provide structure. You can use classic vanilla, chocolate, or even gluten-free wafers to suit your preferences.
- Creamy Layers: Cream cheese, sweetened condensed milk, or whipped cream often form the middle layer. This adds richness and holds the bars together.
- Chocolate or Caramel Toppings: Melted chocolate, caramel sauce, or even ganache adds a decadent finish.
- Crunchy Additions: Nuts, crushed cookies, or cereal can be sprinkled on top for extra texture.
- Flavor Enhancers: Vanilla extract, espresso powder, or citrus zest can be added to elevate the flavor profile.
Steps to Make No-Bake Wafer Cookie Bars
Follow these simple steps to create your own no-bake wafer cookie bars:
- Prepare the Base: Line a baking dish with parchment paper for easy removal. Arrange a single layer of wafer cookies on the bottom of the dish.
- Prepare the filling by blending cream cheese, powdered sugar, and vanilla extract until the mixture is smooth and creamy.
- Layer the Bars: Spread the creamy filling over the base layer of wafers. Add another layer of cookies on top, pressing gently to ensure even layering.
- Add the Topping: Pour melted chocolate or caramel sauce over the top layer. Smooth it out with a spatula, and sprinkle with nuts, coconut flakes, or crushed candy for extra flair.
- Chill and Set: Refrigerate the bars for at least 2–3 hours to allow the layers to firm up. This ensures clean slices and a cohesive texture.
Flavor Variations to Try
No-bake wafer cookie bars are endlessly adaptable. Here are some variations to spark your creativity:
- Chocolate Peanut Butter Bars: Use chocolate wafer cookies, a peanut butter filling, and a drizzle of melted chocolate on top.
- Strawberries and Cream Bars: Add a layer of strawberry preserves between the wafers and top with whipped cream and fresh berries.
- Mocha Delight Bars: Incorporate espresso powder into the filling for a coffee-flavored treat. Top with a dusting of cocoa powder.
- Tropical Bliss Bars: Use coconut-flavored filling, mango puree, and a sprinkle of toasted coconut flakes.
Serving Ideas for No-Bake Wafer Cookie Bars
These bars are as versatile in presentation as they are in flavor:
- Slice and Serve: Cut into bite-sized squares for a dainty dessert platter.
- Layered Desserts: Create individual servings by layering the ingredients in small glasses or jars.
- Party Platters: Decorate the top layer with sprinkles, edible glitter, or themed decorations for special occasions.
Storage Tips for No-Bake Wafer Cookie Bars
To maintain the texture and freshness of your no-bake wafer cookie bars:
- Keep the bars in an airtight container and refrigerate for up to 5 days to maintain the filling’s firmness and the wafers’ crisp texture.
- These bars freeze beautifully. Wrap them securely in plastic wrap, place them in a freezer-safe container, and thaw in the refrigerator overnight before serving.
Creative Ways to Use Wafer Cookies in Desserts
Layered Wafer Cookie Cakes: A Show-Stopping Dessert Made Simple
Layered wafer cookie cakes are an elegant yet easy-to-make dessert that combines the crispness of wafer cookies with luscious layers of cream, custard, or ganache. These cakes are versatile, visually stunning, and require minimal effort to create, making them perfect for entertaining or as a weeknight treat.
What Makes Layered Wafer Cookie Cakes Special?
Layered wafer cookie cakes are a delightful fusion of textures and flavors. The wafer cookies absorb just enough moisture from the filling to soften slightly, creating a cake-like consistency while maintaining a hint of crispness. The simplicity of assembly, paired with endless possibilities for customization, ensures this dessert is a hit at any gathering.
Key Components of Layered Wafer Cookie Cakes
- Wafer Cookies: The foundation of the cake. Use classic vanilla or chocolate wafer cookies, or experiment with flavored varieties like strawberry or coffee. Gluten-free options work just as well for dietary needs.
- Creamy Layers: Whipped cream, mascarpone, cream cheese, or custard create the rich, creamy texture that binds the cake together.
- Flavor Boosters: Add a layer of jam, fruit preserves, or melted chocolate to complement the cookies and cream.
- Toppings: Finish with fresh fruit, grated chocolate, toasted nuts, or a dusting of cocoa powder for a polished look.
How to Assemble a Layered Wafer Cookie Cake
Creating a wafer cookie cake is as simple as layering and chilling. Here’s a step-by-step guide:
- Prepare the Filling: Whip your chosen filling, such as sweetened whipped cream or a mascarpone mixture, until light and fluffy. Add vanilla extract, citrus zest, or cocoa powder for added flavor.
- Layer the Cookies: Spread a thin layer of filling at the base of your serving dish to anchor the cookies. Arrange a single layer of wafer cookies over the filling.
- Build the Cake: Spread a generous layer of filling over the cookies, ensuring even coverage. Repeat the process, alternating layers of cookies and filling, until you reach your desired height.
- Finish with a Topping: Spread a smooth layer of filling on the top and garnish with your chosen toppings, such as fresh fruit, chocolate shavings, or crushed cookies.
- Chill to Set: Refrigerate the assembled cake for at least 4–6 hours, or overnight, to allow the cookies to soften and the flavors to meld.
Creative Variations for Layered Wafer Cookie Cakes
Layered wafer cookie cakes are endlessly customizable. Here are some variations to inspire your next creation:
- Tiramisu-Inspired Cake: Use coffee-flavored wafer cookies and layer with mascarpone filling, dusting cocoa powder between each layer.
- Berry Bliss Cake: Alternate layers of vanilla wafers with whipped cream and fresh berries, such as strawberries, raspberries, or blueberries.
- Chocolate Overload Cake: Combine chocolate wafers with layers of chocolate mousse or ganache for a rich, indulgent dessert.
- Coconut Delight Cake: Use coconut cream filling and sprinkle shredded toasted coconut on each layer for a tropical twist.
Serving and Presentation Tips
- Neat Slices: Use a sharp knife to cut clean slices, wiping the blade between cuts for a polished presentation.
- Individual Portions: Assemble mini wafer cookie cakes in ramekins, glasses, or jars for an elegant, single-serving dessert.
- Decorative Elements: Add edible flowers, sprinkles, or caramel drizzles for a festive look.
Storage Tips for Layered Wafer Cookie Cakes
- Refrigeration: Store the cake in the refrigerator, covered with plastic wrap or in an airtight container, for up to 3–4 days. The flavors improve as the layers meld together.
- Freezing: Freeze leftover slices in airtight containers for up to a month. Thaw in the fridge for a few hours before serving.
Ice Cream Sandwiches with Wafer Cookies: A Cool, Crunchy Delight
Ice cream sandwiches with wafer cookies offer a fun and delicious twist on the classic dessert. The crisp, delicate texture of wafer cookies provides the perfect contrast to the creamy, smooth ice cream, creating an irresistible treat. Whether served as a refreshing summer dessert or a delightful snack, these wafer cookie ice cream sandwiches are a crowd favorite that can be customized with a variety of ice cream flavors and toppings.
Why Wafer Cookies Make the Perfect Ice Cream Sandwich Base
Wafer cookies are an ideal choice for ice cream sandwiches because of their unique texture. Their light, crisp crunch holds up well against the cold, creamy filling without becoming soggy, offering a satisfying bite. Plus, they don’t overpower the flavor of the ice cream, allowing it to shine through. The airy, slightly sweet taste of wafers perfectly complements a range of ice cream varieties, making them a versatile and easy-to-make option for homemade ice cream sandwiches.
Choosing the Right Wafer Cookies for Your Ice Cream Sandwiches
While traditional vanilla wafer cookies are a classic choice, the possibilities are endless when it comes to selecting the perfect wafer cookies for your sandwiches:
- Classic Vanilla Wafer Cookies: Simple and sweet, these are the go-to for a traditional ice cream sandwich. Their subtle flavor pairs well with virtually any ice cream.
- Chocolate Wafer Cookies: For a richer, more indulgent treat, chocolate wafer cookies add a decadent layer that pairs wonderfully with ice cream flavors like mint, coffee, or chocolate chip.
- Fruit-Flavored Wafer Cookies: For a lighter, fresher option, try fruit-flavored wafer cookies such as strawberry or lemon. These are excellent with fruity ice cream options like strawberry, raspberry sorbet, or lemon custard.
- Gluten-Free Wafer Cookies: For those with dietary restrictions, gluten-free wafer cookies are a great option that still maintains the crispness and crunch of the traditional treat.
Ice Cream Choices for Wafer Cookie Sandwiches
The beauty of these sandwiches is the endless variety of ice cream you can use. Here are some suggestions to suit different tastes and preferences:
- Classic Flavors: Vanilla, chocolate, or strawberry ice cream are timeless choices that pair perfectly with wafer cookies.
- Indulgent Flavors: Rich ice cream flavors like cookies and cream, chocolate fudge, or caramel swirl work wonderfully with chocolate wafer cookies for a more decadent dessert.
- Fruity Flavors: Lemon, raspberry, or mango sorbet offer a refreshing contrast to the sweetness of the wafer cookies. Fruit-flavored ice creams like strawberry or peach also pair beautifully with fruit-flavored wafers.
- Non-Dairy Options: For those avoiding dairy, non-dairy ice creams made from coconut milk, almond milk, or oat milk can also be used, ensuring everyone can enjoy this treat.
How to Assemble Ice Cream Sandwiches with Wafer Cookies
Making ice cream sandwiches with wafer cookies is simple and fun! Follow these steps for a perfectly balanced treat:
- Get the Ingredients Ready: Select your wafer cookies and ice cream flavors. Let the ice cream soften a bit to make it easier to spread.
- Assemble the Sandwich: Take two wafer cookies and place a scoop of softened ice cream between them. Gently press the cookies together, ensuring the ice cream is evenly spread.
- Shape and Size: For a neat presentation, use a spoon or an ice cream scooper to portion out the ice cream. You can make them as thick or thin as you like, depending on how much ice cream you prefer.
- Roll in Toppings (Optional): For added texture and flavor, roll the edges of the ice cream sandwich in crushed nuts, chocolate chips, sprinkles, or mini marshmallows. This not only adds flavor but also makes the sandwich look extra fun!
Freezing and Storing Ice Cream Sandwiches
Once your wafer cookie ice cream sandwiches are assembled, you’ll want to freeze them to maintain their shape and texture:
- Chill Immediately: Place the sandwiches on a baking sheet lined with parchment paper and freeze for at least 2 hours. This allows the ice cream to firm up and helps keep the cookies crisp.
- Store for Later: If you have leftovers, store the sandwiches in an airtight container or wrap them individually in plastic wrap to prevent freezer burn. They will stay fresh for up to 1–2 weeks in the freezer.
- Serve Frozen: When serving, take the sandwiches out of the freezer just long enough to soften slightly for easier biting and enjoy them cold and refreshing.
Fun Variations for Ice Cream Sandwiches with Wafer Cookies
To take your ice cream sandwiches to the next level, consider these fun variations:
- Mini Ice Cream Sandwiches: For a bite-sized treat, use mini wafer cookies and small scoops of ice cream. These are perfect for parties or snack-time indulgences.
- DIY Sandwich Bars: Set up a DIY ice cream sandwich station at your next event, where guests can choose their favorite wafer cookies, ice cream flavors, and toppings to create their custom sandwiches.
- Sandwich with Homemade Ice Cream: Make your ice cream from scratch for a truly personalized dessert. Experiment with unique flavors like salted caramel, lavender honey, or pistachio to surprise your guests.
Serving Ideas and Presentation
- Plating: Arrange the sandwiches on a platter with colorful fruit or a dusting of powdered sugar for an extra touch of elegance.
- Themed Parties: Serve the ice cream sandwiches at a summer BBQ, birthday party, or a holiday gathering for a fun and casual dessert option.
Wafer Cookie Crumbs: A Versatile Ingredient for Baking and Beyond
Wafer cookie crumbs are a wonderfully versatile ingredient that can elevate both sweet and savory dishes. Whether you’re using them as a base for crusts, a topping for desserts, or mixing them into batters for added texture, wafer cookie crumbs are a convenient way to add crunch and flavor. Their light, crisp texture makes them perfect for creating easy, no-bake treats or enhancing baked goods with a subtle sweetness and crunch.
How to Make Wafer Cookie Crumbs
Making wafer cookie crumbs is incredibly easy and can be done in a few simple steps:
- Crushing by Hand: If you’re looking for a rustic texture, place the wafer cookies in a plastic bag and use a rolling pin or heavy object to crush them into small pieces. This method works well if you prefer coarser crumbs.
- Using a Food Processor: For fine crumbs, pulse the wafer cookies in a food processor until they reach the desired consistency. This method is quicker and gives you a uniform texture, ideal for use in crusts or smooth fillings.
- Crushing with a Blender: Similar to the food processor method, a blender can also break down the cookies into fine crumbs. Just be sure to pulse gently to avoid over-processing into a powder.
Creative Ways to Use Wafer Cookie Crumbs
Wafer cookie crumbs are more than just a topping or a crust. Here are some creative ways to incorporate them into various recipes:
- Pie and Tart Crusts: Combine wafer cookie crumbs with melted butter and a touch of sugar to create a simple, delicious crust for pies and tarts. This easy alternative to traditional graham cracker crusts pairs perfectly with creamy fillings like chocolate mousse, custard, or fruit-flavored cream cheese.
- Layered Parfaits: Layer wafer cookie crumbs with yogurt, whipped cream, or custard and fresh fruit for an easy, no-bake dessert. The crumbs add texture and flavor, while the creamy layers balance out the sweetness.
- Cake Mix-ins: Add crushed wafer cookies to cake batter or cupcakes for an unexpected crunch. They pair especially well with chocolate or vanilla cakes and can be folded directly into the batter.
- Crispy Coatings: Use wafer crumbs as a breading or coating for fried treats like chicken tenders, shrimp, or vegetables. The wafers add a sweet, crispy exterior, making them an interesting alternative to traditional breadcrumbs.
- Truffles and No-Bake Cookies: Combine wafer crumbs with condensed milk, cocoa powder, and your favorite flavorings to make no-bake cookie dough balls or truffles. They hold the mixture together and give a pleasant crunch to every bite.
- Crumble Topping: Sprinkle crushed wafer cookies over fruit crisps, crumbles, or cobblers before baking for a sweet, crunchy topping. The crumbs add texture and a subtle sweetness that complements the tartness of the fruit.
- Ice Cream Mix-ins: Stir wafer cookie crumbs into homemade or store-bought ice cream for added texture. They blend well into chocolate or vanilla ice cream, providing a sweet crunch with every bite.
Flavor Variations of Wafer Cookie Crumbs
Wafer cookie crumbs come in a variety of flavors, making them even more versatile in the kitchen. Here are some variations to try:
- Chocolate Wafer Crumbs: Perfect for creating rich, decadent crusts or mixing into chocolate desserts. These crumbs work especially well for pies, cheesecakes, and no-bake bars.
- Strawberry Wafer Crumbs: Ideal for fruit-based desserts like strawberry shortcake or fruit salad parfaits. The fruity flavor adds a light, refreshing taste to creamy desserts.
- Coffee-Flavored Wafer Crumbs: For coffee lovers, using coffee-flavored wafer crumbs in tiramisu-inspired desserts, cakes, or ice cream can add an extra dimension of flavor.
- Cinnamon Wafer Crumbs: These add a warm, comforting spice to baked goods or toppings for fruit crisps. Cinnamon wafer crumbs are perfect for autumnal desserts or spiced cakes.
Tips for Storing Wafer Cookie Crumbs
Wafer cookie crumbs can be stored for later use, ensuring that you always have them on hand for your baking and cooking needs:
- Airtight Container: Store the crumbs in an airtight container or a resealable plastic bag to keep them fresh. Proper storage prevents them from becoming stale and helps retain their crunch.
- Freezing: For longer-term storage, wafer crumbs can be frozen. Simply place them in a freezer-safe bag or container and label it with the date. Frozen crumbs can be kept for up to 3 months and thawed at room temperature when needed.
- Avoid Humidity: Keep the crumbs in a cool, dry place, away from humidity, which can cause them to clump together and lose their crispness.
Serving Ideas and Presentation
Here are some fun ideas for presenting dishes with wafer cookie crumbs:
- Dessert Bar: Set up a « build-your-own » dessert bar with various toppings, including wafer cookie crumbs, chocolate chips, sprinkles, and fruit. This is a fun activity for parties or family gatherings.
- Gift Jars: Layer wafer cookie crumbs with other dessert ingredients like cocoa powder, marshmallows, or crushed candies in mason jars for a sweet DIY gift idea.
Storing and Serving Wafer Cookies
How to Store Homemade Wafer Cookies: Tips for Freshness and Longevity
Homemade wafer cookies are a delightful treat, but to maintain their crispness and freshness, proper storage is essential. The right storage techniques will ensure that your cookies stay as delicious as the day they were made, without losing their texture or flavor. Below, we explore the best ways to store homemade wafer cookies, whether you’re keeping them for a few days or freezing them for long-term storage.
For more expert tips on storing baked goods, you can visit this guide on proper storage techniques from Encyclopedia Britannica.
1. Store in an Airtight Container
The most effective way to store homemade wafer cookies is by using an airtight container. These containers help preserve the cookies’ crispness and protect them from exposure to air and moisture, which can cause them to become soft or stale.
- Plastic Containers: Use a plastic storage container with a tight-sealing lid. This type of container is easy to find, lightweight, and perfect for storing cookies for up to a week.
- Glass Jars: For a more elegant presentation, store your wafer cookies in glass jars with rubber-seal lids. They provide the same airtight protection while allowing you to see the cookies, which can be visually appealing on a countertop or in a pantry.
- Cookie Tins: For long-term storage or when gifting homemade cookies, metal cookie tins are an excellent option. They protect against moisture and offer a traditional, charming storage solution.
2. Use Parchment Paper to Separate Layers
When storing multiple layers of wafer cookies, it’s essential to prevent them from sticking together or becoming crushed. Place a piece of parchment or wax paper between each layer to ensure the cookies remain intact and don’t lose their shape.
- Layering with Care: Place the cookies in a single layer if possible, but if stacking is necessary, ensure each layer is separated with parchment paper to minimize pressure on the delicate cookies.
- Avoid Overcrowding: Don’t overcrowd the container, as this can lead to breakage or uneven storage. Allow enough space for the cookies to stay crisp and intact.
3. Store at Room Temperature
Wafer cookies are best stored at room temperature, especially if you plan to consume them within a few days. Storing them in a cool, dry place away from sunlight or humidity helps maintain their texture. A pantry, cupboard, or kitchen counter is ideal for short-term storage.
- Ideal Temperature: Keep the container in a cool area, ideally between 65°F and 75°F (18°C–24°C). Avoid placing the cookies near heat sources like ovens, stoves, or windows, as excess heat or humidity can cause the cookies to soften.
- No Refrigeration Needed: Unlike some baked goods, wafer cookies do not require refrigeration. Storing them in the fridge can cause the cookies to absorb moisture, losing their signature crispness.
4. Freezing Homemade Wafer Cookies for Long-Term Storage
If you have leftover wafer cookies or simply want to store them for a longer period, freezing is an excellent option. Freezing preserves the cookies’ texture and flavor for months, making it easy to enjoy them later.
- Wrap Individually: Wrap each wafer cookie or a stack of cookies tightly in plastic wrap or foil. This step helps protect the cookies from freezer burn and maintains their texture.
- Use Freezer-Safe Bags or Containers: After wrapping, place the cookies in a freezer-safe resealable plastic bag or airtight container. Squeeze out any excess air before sealing to prevent freezer burn and moisture buildup.
- Label and Date: Don’t forget to label the container with the date you froze the cookies, so you can keep track of how long they’ve been in the freezer. Homemade wafer cookies can last up to 3 months in the freezer without losing their flavor or texture.
- Thawing: To thaw, simply remove the cookies from the freezer and let them sit at room temperature for about 30 minutes to an hour. The cookies will return to their original crispness after thawing.
5. Store with Dry Ingredients for Extra Freshness
To prevent your homemade wafer cookies from becoming too soft, you can add a small packet of silica gel or a moisture-absorbing sachet to the container. These will absorb excess moisture and keep the cookies crisp for longer.
- Rice or Silica Gel Packs: Place a small packet of rice or a commercial silica gel pack inside the storage container to absorb moisture and help maintain the texture of the cookies.
- Oxygen Absorbers: If you’re storing a large quantity of cookies for a longer period, oxygen absorbers can also help extend the shelf life by keeping out excess oxygen and moisture, which can cause the cookies to go stale.
6. Storing Wafer Cookies for Gifting or Special Occasions
When gifting homemade wafer cookies, it’s important to present them properly while also ensuring they remain fresh. For special occasions like holidays, birthdays, or celebrations, consider these storage and presentation tips:
- Gift Packaging: Package the cookies in decorative tin cans, mason jars, or clear cellophane bags with ribbons. These not only make the cookies look attractive but also help protect them during transport.
- Add a Note: Include a note with storage instructions for the recipient, especially if they are not familiar with how to store wafer cookies. You can suggest storing them in an airtight container and offer freezing tips for longer enjoyment.
Signs That Wafer Cookies Have Gone Stale
It’s important to recognize when wafer cookies have lost their crispness or flavor. Stale cookies may appear slightly softened or lose their original lightness. They may also become sticky or absorb moisture from the air, which affects the texture.
- Softness: If the cookies feel too soft or chewy instead of crisp, it’s likely they’ve absorbed moisture and need to be discarded.
- Off Flavor: If the cookies have a strange taste or odor, they may have spoiled, especially if they have been stored improperly.
Packaging Ideas for Gifting Wafer Cookies: Creative and Thoughtful Ways to Present Your Treats
Wafer cookies make for a delightful and thoughtful homemade gift, perfect for holidays, birthdays, or just as a sweet surprise for friends and family. However, presenting these delicate treats in a thoughtful and appealing way adds a personal touch that elevates the entire gifting experience. The right packaging not only preserves the cookies but also enhances their visual appeal, making them look as good as they taste. Here are some creative packaging ideas for gifting wafer cookies that will impress your recipients.
1. Classic Tin Cans for Timeless Elegance
A classic and timeless way to package wafer cookies is by using metal cookie tins. These sturdy tins are perfect for maintaining the freshness and crispness of your homemade treats. They come in a variety of designs, from vintage to modern, and can easily be customized with ribbons, tags, or other embellishments.
- Why Choose Tin Cans?
- Air-tight Seal: Metal tins protect the cookies from moisture and air, keeping them crisp longer.
- Elegant Presentation: A beautifully decorated tin gives a professional and polished look to your gift.
- Versatility: Tins come in different sizes, so you can choose one that suits the quantity of cookies you’re giving.
- Personalization Ideas:
- Add a personal touch with a custom label featuring the recipient’s name or a festive greeting.
- Decorate the tin with ribbons, stickers, or even handmade tags for a charming finishing touch.
- Consider lining the tin with parchment paper or tissue paper to provide an extra layer of protection and add an aesthetic element.
2. Mason Jars for a Rustic, Homey Look
Mason jars are a popular and charming option for packaging cookies. They are not only affordable but also give off a rustic, homemade vibe, making them perfect for casual gifts or when you want to present your wafer cookies with a personal, down-to-earth touch.
- Why Choose Mason Jars?
- See-through Design: The clear glass allows the cookies to be visible, creating a visually appealing display of your treats.
- Reusable: The recipient can repurpose the jar for storage or as decor, making it a sustainable choice.
- Versatility: Mason jars can be decorated in various ways to fit any theme, whether it’s vintage, rustic, or modern.
- Personalization Ideas:
- Tie a cute ribbon or twine around the neck of the jar and attach a handwritten tag or label.
- For added charm, use burlap fabric or a festive cloth to cover the lid, securing it with a ribbon.
- You could also layer the jar with a mix of different wafer cookies or even other treats, creating a layered effect that looks both beautiful and tempting.
3. Cellophane Bags for Simple and Stylish Gifts
If you prefer something more minimalist and modern, cellophane bags are an excellent choice. These bags are transparent and give the cookies a « store-bought » appearance, making them look elegant and professional without a lot of effort.
- Why Choose Cellophane Bags?
- Affordable and Easy to Use: Cellophane bags are inexpensive, easy to find, and come in various sizes to accommodate different quantities of cookies.
- Protects Freshness: Cellophane is a great option for storing wafer cookies as it protects them from dirt, dust, and moisture.
- Customizable: You can easily personalize these bags with decorative elements like ribbons, gift tags, or stickers.
- Personalization Ideas:
- Add a festive ribbon or bow to the top of the bag, and attach a custom gift tag with a message.
- Use a stamp or sticker to seal the bag, giving it a neat, polished look.
- For a unique touch, fill the cellophane bag with different types of wafer cookies or mix in colorful candies or chocolate for a fun twist.
4. Decorative Boxes for a Luxury Feel
For a more upscale gift presentation, decorative gift boxes are a fantastic option. These boxes, which come in various shapes, sizes, and designs, can instantly elevate your wafer cookie gift and make it feel luxurious and special.
- Why Choose Decorative Boxes?
- Sturdy and Secure: Gift boxes are durable, which makes them great for packaging delicate cookies like wafer cookies. They offer a protective layer and prevent the cookies from getting crushed during transport.
- Elegant Designs: Many decorative boxes come in elegant designs, making them perfect for special occasions like weddings, holidays, or anniversaries.
- Customizable: Decorative boxes can easily be personalized with stickers, ribbons, or even a handwritten note to make them more unique.
- Personalization Ideas:
- Choose a box in a color that fits the recipient’s personality or the theme of the event (e.g., red for Valentine’s Day, gold for a wedding).
- Use satin or velvet ribbons to tie a bow around the box, adding a luxurious touch.
- For an extra level of elegance, include a personalized note or a small card with a heartfelt message.
5. Clear Acrylic Boxes for a Modern, Sleek Presentation
For a contemporary and sleek look, consider using clear acrylic boxes. These modern containers are sturdy and transparent, allowing the recipient to see the cookies inside. Acrylic boxes offer a fresh, upscale presentation that works well for corporate gifting, weddings, or events.
- Why Choose Clear Acrylic Boxes?
- Stylish and Modern: These boxes have a clean, minimalistic design that works well for modern gifts.
- Protection: Acrylic provides a rigid, protective surface that keeps the cookies intact and prevents them from getting crushed.
- High Visibility: The transparency of the box makes the cookies the focal point of the gift.
- Personalization Ideas:
- Decorate the box with metallic or satin ribbons to add some elegance.
- Attach a small custom label or card with the recipient’s name or a short message.
- Consider adding other treats or embellishments, such as chocolate truffles or small sachets of tea, to complement the wafer cookies.
6. DIY Cookie Pouches for a Fun and Crafty Touch
If you enjoy a bit of crafting, DIY cookie pouches made from fabric or felt can be a unique and creative way to package wafer cookies. These pouches offer a homemade and personalized look, making them perfect for family or close friends.
- Why Choose DIY Cookie Pouches?
- Personal and Customizable: You can create pouches in any fabric, color, or design that matches the recipient’s style or the occasion.
- Eco-Friendly: Fabric pouches are reusable, making them an environmentally friendly option compared to single-use packaging.
- Fun Crafting Opportunity: Making your own pouches adds a personal touch to the gift and is a fun, creative way to showcase your baking.
- Personalization Ideas:
- Sew on personalized patches, embroidery, or labels to give each pouch a unique touch.
- Add decorative buttons or small charms for a bit of flair.
- Pair the pouch with a homemade card or a handwritten recipe to complete the gift.
Serving Suggestions for Different Occasions: Elevate Your Wafer Cookies with Perfect Pairings and Presentations
Wafer cookies are incredibly versatile and can be served in various ways to complement different occasions. Their delicate, crispy texture and sweetness make them an ideal treat for a variety of events, from casual gatherings to formal celebrations. Below are some serving suggestions for wafer cookies that will help you elevate your offerings and make each occasion memorable.
1. Coffee or Tea Parties: A Light and Elegant Snack
Wafer cookies pair beautifully with a hot cup of coffee or tea, making them a perfect addition to a cozy afternoon gathering. The crisp texture and subtle sweetness of the cookies contrast wonderfully with the richness of the beverages, offering a light yet satisfying treat.
- Why It Works: The lightness of wafer cookies doesn’t overpower the drink but complements it, creating a balanced and enjoyable experience. The delicate crunch of the wafers pairs nicely with the smoothness of tea or coffee.
- Serving Ideas:
- Serve a small plate of assorted wafer cookies alongside your guests’ preferred beverages, offering a variety of flavors such as classic vanilla, chocolate, or even caramel.
- For a more refined presentation, arrange the cookies on a tiered cake stand with elegant china or glassware for a sophisticated tea party setup.
- Pair vanilla wafer cookies with a light white tea or a floral green tea for a fresh and subtle flavor combination.
- Pair chocolate wafer cookies with a rich coffee blend, such as an espresso or a medium roast, to balance the sweetness with the bitterness of the coffee.
2. Holiday Celebrations: Festive and Fun
Wafer cookies are a delightful addition to any holiday celebration, whether it’s Christmas, Easter, or a special birthday. Their versatility allows you to adapt them to the occasion, either by incorporating seasonal flavors or decorating them to match the holiday theme.
- Why It Works: Wafer cookies can be easily customized with festive colors, sprinkles, or icing to match the holiday’s theme. They also make great accompaniments to other holiday treats, such as cakes or pastries.
- Serving Ideas:
- For Christmas, serve chocolate-coated wafer cookies alongside gingerbread cookies or sugar cookies for a variety of textures and flavors.
- Decorate vanilla wafer cookies with colored icing and sprinkles for a fun and festive touch. You can even create cookie sandwich shapes using icing between two wafers for a fun treat.
- Serve an assortment of wafer cookies with a holiday punch or mulled wine. The sweetness of the cookies complements the spices of the holiday beverages, creating a well-rounded taste experience.
- If hosting a holiday brunch, serve wafer cookies as part of a dessert table, alongside pies, fruit, and other light desserts.
3. Birthdays and Special Occasions: Fun and Sweet Treats
Wafer cookies can be a fun and easy way to add a sweet touch to birthday parties or any celebratory event. Their customizable nature makes them ideal for personalizing to fit the theme of the event, and their bite-sized nature means they can be enjoyed by guests of all ages.
- Why It Works: Wafer cookies are light and not overly indulgent, making them a great treat for events where guests are eating a variety of food. Their versatility allows them to be adapted to any celebration, whether it’s a child’s birthday or an anniversary.
- Serving Ideas:
- Create a DIY wafer cookie sandwich station for kids, where they can add their choice of filling (like frosting, Nutella, or whipped cream) to between two wafer cookies. This makes the treat interactive and personalized for each guest.
- For an adult birthday or anniversary celebration, serve a platter of wafer cookies alongside a dessert buffet, pairing the cookies with mousse, fruit compote, or sorbet for a refreshing dessert option.
- For a festive touch, decorate the wafer cookies with colorful icing or edible glitter to fit the theme of the birthday or special occasion.
4. Cocktail Parties or Appetizers: A Light and Elegant Bite
Wafer cookies can also serve as a sophisticated appetizer or dessert for cocktail parties. Their light texture and subtle sweetness make them an excellent alternative to heavier desserts or snacks, providing a light yet flavorful option for guests to nibble on between drinks.
- Why It Works: The crisp, delicate nature of wafer cookies pairs well with a wide range of cocktails and light appetizers. The cookies’ sweetness is the perfect counterbalance to more savory or acidic flavors.
- Serving Ideas:
- For a savory twist, consider filling the wafer cookies with a light cream cheese or herb-based spread and serving them alongside cocktails. These savory wafer sandwiches will provide a crisp contrast to the rich flavors of cocktails like martinis or champagne.
- Serve a platter of wafer cookies alongside finger foods such as cheese, olives, or crackers. Their delicate sweetness offers a refreshing contrast to the saltier snacks.
- For a themed cocktail party, choose wafer cookies that match the flavors of the cocktails being served. For example, chocolate wafer cookies pair wonderfully with cocktails featuring chocolate liqueur, such as a chocolate martini or an espresso martini.
5. Family Gatherings or Casual Get-Togethers: Simple and Delicious
When hosting a family gathering or casual get-together, wafer cookies are a perfect snack that’s easy to serve, doesn’t require much preparation, and can be enjoyed by guests of all ages. Their versatility means they can fit into any casual event seamlessly.
- Why It Works: Wafer cookies are simple to prepare in advance and can be served without much fuss. They provide a sweet treat without being overly heavy, making them ideal for casual events where guests might be nibbling throughout the evening.
- Serving Ideas:
- Set out a large bowl of assorted wafer cookies for guests to grab as they mingle. You can also provide small individual bags or boxes for a more convenient serving option.
- Serve with a variety of dips, such as chocolate fondue or caramel sauce, for guests to dip the wafer cookies and enjoy them in a more interactive way.
- Include wafer cookies as part of a DIY dessert bar, where guests can add toppings like whipped cream, fruit, or chocolate drizzle to customize their cookies.
6. Summer Parties: Refreshing Pairings
Wafer cookies are an ideal treat for summer gatherings. Their light texture and simple flavors make them a perfect accompaniment to refreshing summer drinks and outdoor meals.
- Why It Works: Wafer cookies are cool and crisp, making them a perfect choice for hot summer days. Their neutral flavor pairs well with fruit-based drinks, iced teas, or even a refreshing summer punch.
- Serving Ideas:
- Serve chocolate wafer cookies with iced coffee or cold brew coffee for a sweet, refreshing break during a summer BBQ or picnic.
- Pair vanilla wafer cookies with a citrusy lemonade or sparkling water for a light and bright summer pairing.
- For a fun twist, use wafer cookies as part of a DIY ice cream sandwich bar at a summer party. Set up a station with various ice cream flavors and toppings, allowing guests to create their own perfect wafer cookie ice cream sandwich.
Conclusion: The Timeless Appeal of Wafer Cookies
Wafer cookies are a versatile and delightful treat that can fit perfectly into almost any occasion. With their light, crisp texture and subtly sweet flavor, they offer a refreshing contrast to richer, heavier desserts, making them a favorite choice for many. Whether you’re serving them at a cozy tea party, a festive holiday gathering, or a casual family get-together, wafer cookies can be enjoyed in countless ways.
From classic vanilla and chocolate wafer cookies to innovative variations like gluten-free or no-bake versions, there’s no shortage of ways to enjoy these simple yet elegant cookies. Paired with beverages, transformed into dessert bars, or included in creative gifting packaging, wafer cookies bring an added layer of joy and personalization to any event. Whether homemade or store-bought, wafer cookies have a timeless appeal that continues to delight people of all ages. So, the next time you’re planning a special occasion or simply craving a light snack, reach for wafer cookies. They’re sure to add that perfect touch of sweetness to your day!
Frequently Asked Questions (FAQ)
1. What are wafer cookies?
Wafer cookies are light, crispy biscuits made from thin layers of dough, typically filled with cream or chocolate. They are known for their crunchy texture and delicate flavor.
2. How can I customize my wafer cookies?
You can customize wafer cookies by experimenting with different fillings such as vanilla, chocolate, hazelnut, or even fruit jam. You can also dip them in chocolate or dust them with powdered sugar for extra flavor.
3. Are wafer cookies easy to make at home?
Yes! Wafer cookies are relatively simple to make at home. You’ll need basic ingredients like flour, sugar, butter, and eggs. The key is in the thin layering and filling for that perfect crunch.
4. Can I make wafer cookies without a waffle iron?
Yes, you can. While a waffle iron is commonly used to cook the thin layers, you can also bake them in the oven using a baking sheet and a cookie cutter for uniform shapes.
5. How should I store wafer cookies?
Store your wafer cookies in an airtight container to keep them crisp. They should be kept in a cool, dry place to prevent them from becoming soft or stale.
6. Are wafer cookies gluten-free?
Traditional wafer cookies contain wheat flour, so they are not gluten-free. However, you can find gluten-free versions or make your own using gluten-free flour alternatives.
7. Can I freeze wafer cookies?
Yes, you can freeze wafer cookies. To keep them crisp, make sure they are fully cooled and stored in an airtight container or freezer-safe bag.
8. How long do wafer cookies last?
When stored properly, wafer cookies can last for several weeks. However, their texture is best within the first few days of baking.
If you’re interested in more delicious recipes, feel free to explore the suggestions below: